I'll not waste a lot of time on preamble and we'll jump right in. The box as shipped is well packed. The parts are all nestled away in their individual bags, organized by sections of Titan.
First off are the bags with Laser Blaster and what I like to call, "Piston Hell"...
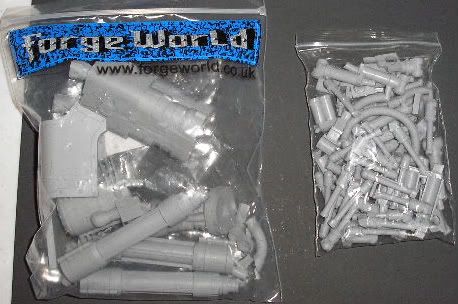
Next we have the huge bag O'legs...
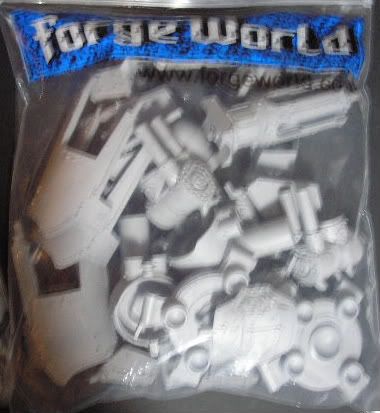
The Gatling Blaster and Torso...

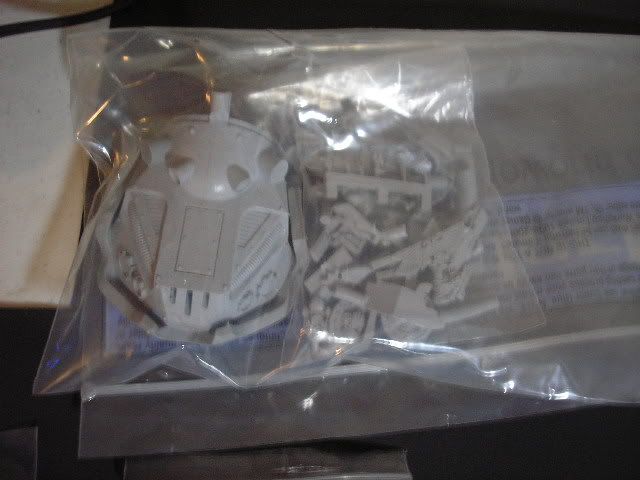
Then there is the Head and Interior parts...
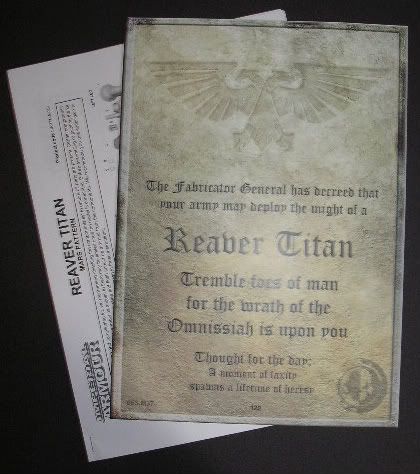
And, of course, the Instructions and Certificate. Number 122 for the record...
Now comes my first of what I'm sure will be many apologies. Somehow I've lost pics of two more large bags containing large parts. I assure you, there will be plenty of opportunity to see all the parts as we begin assembly!
Now that we've ogled the parts in bag (those that I managed to show you), it's on to the wash! The parts have a coating of a release agent from when they were cast. This has to be removed or paint will never stick. My weapon of choice for this process is Simple Green. I went to my local DIY store and bought a couple of 2.5 gallon buckets for under five bucks. The blue one has several small holes drilled in the bottom, this will be my rinse bucket. The Red is intact and will hold a mixture of Simple Green and water in about a one to ten mixture.

I place a bag or two of parts into the cleaning solution and let them sit a few minutes. The parts go in no particular order, but I be sure to keep only one category or small parts in the process at once. So until all the small leg parts are completely through the process I won't run any small torso parts through. But, I might add any bags of large pieces. The process itself is pretty simple. I pick up one piece at a time, scrub it with a soft bristle brush, and rinse it manually then put it in the rinse bucket. At this point there is a slow stream of water flowing into (and out of) the rinse bucket to facilitate the first rinse and a soak in water. With some care, the water going into the rinse bucket and out of it will be about equal. Once the cleaning solution bucket is empty and the rinse bucket has a good pile in it, I fill up the wash bucket with new parts and let them sit while I give the parts in the rinse bucket their final rinse. I turn the water on a little stronger and hold each piece under the flow again. Then it's off to a towel or paper towel to dry. Repeat... repeat... repeat...

(in my meager defense, I was making a face for the camera... thanks sweetheart!)
A couple hours and sore back later and we have all the parts cleaned and drying!
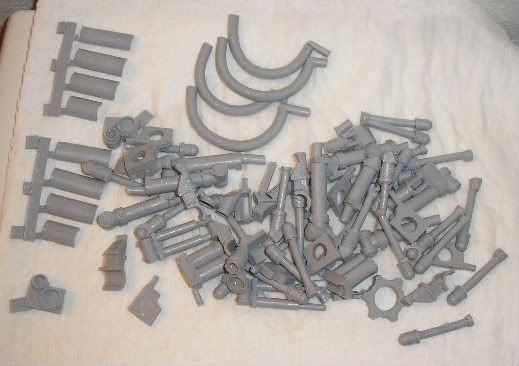
Some large parts in no particular order...
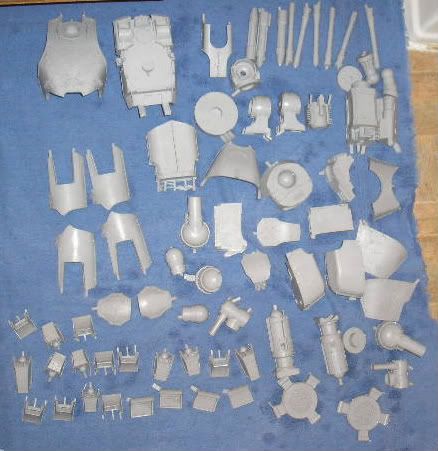
Some small leg parts...
Some small head and interior parts...

And, some small torso parts...

It's about a metric ass-ton of parts. Now, on to what I've learned so far about this kit.
The quality is really good. In fact, I'd go as far as to say, excellent. The washing process gives you a chance to handle each and every part... several times. I noted one part that may need a little filler in a non critical area. I also noted two parts with very slight warping. For the sheer number of pieces in this kit that is amazing! Of course, I might find more as we begin the assembly process, but I don't think there will be too many. This kit also included no chipped or broken pieces... amazing! Maybe I'm too easy to please, but I must say, I'm happy with the quality of the kit so far.
I hope you've enjoyed this first step in building a titan. If you have any questions, comments, or critiques please let me know. I'll happily clarify or, if I can, re-photo anything that's not clear. Thanks for stopping by!
13 comments:
People do bitch about the price of these things... but with that many finely cast components... jeeeez.
I'm practically frothing at the mouth at the thought of how much fun that'd be to assemble.
Awesome, looking forward to seeing your assembly.
Fun. Yes.
I like modelling most of all, but that really is a huge amount of small piston-y bits.
In my (limited) experience, FW instructions are pretty vague: I hope these are a little more comprehensive for you, mate!
Also, I don't wash FW bits any more: I can't be arsed, and I've noted that if you use a spry undercoat (Chaos Black, in my case) the paint keys in pefectly.
I'm very excited about this leggy bad-boy - very excited indeed.
What's more: three cheers for The Inner Geek having (a) an understanding and patient girlfriend, and (b) time and space to dry out a Reaver titan having just moved house!
Breath baited for more...
- Drax
PS: I like the acronym 'SMIG' used by Running from the Law: it reminds me of a Sgt. Maj. Instructing Gunnery - fearsome but cheerful fellows in the Royal Artillery!
Oh, and by "spry" undercoat, I did - of course - mean "spray undercoat".
D'oh.
- Drax
Fantastic, I had been looking for someone to blog one of these awesome models, I'm really looking forward to seeing you tackle it!
Your a brave man though. I consider the amount of time it will take to assemble that thing (not to mention paint it) and I shudder. Good luck!
Excellent start. This is going to give us all a chance to build on vicariously through you.
Looking forward to progress.
Nice job with the washing station too.
I am the king of acronyms! :)
I'm really excited to see the progress of this thing. It looks daunting to put together, but then again I hate (HATE) building big guys like that. I didn't have the patience for my warhound a couple years back, so I had I local guy we all call the Fabricator General do it for me. He's incredibly good and fast (like crazy fast).
So good luck with the assembly, should be fun (if you enjoy that sorta thing ;).
WOW. Wow that's pretty cool. Keep up the posts!
Does all Forgeworld resin parts have that coating on them? Where did you acquire that Simple Green solution?
Whoa lots more parts then i imagined. Very cool and Good luck building that beast!
@ Drax
You don't wash your resin??? The paint will go on nice, but it will also come off nice if the release is still on the part. Tisk tisk.
@ DVDHawk
All hail the king!
@ Ian
To some degree, yes. Some worse than others, but I'd not spend the time and money on a resin kit and take a chance. It's worth the extra step in my opinion.
@ Keeper of the Fortress
Yes, it's more parts than I imagined too!
Oh.
I'll consider my wrists slapped! I must have been lucky with my FW stuff - mind you, most of my models get varnished when/if they're finished: that must help.
Either way, I simply love the cleansing system you set up: especially the rinsing bucket: pure genius!
Nice work - methinks this progress project of yours may generate quite a stir...
- Drax.
Congratulations on owning such a cool model. I hope to be able to get one around X'mas. Let's see if by then they'll have different weapons.
Please chek my WIP on the Warhound at:
Warhound
Let me know what you think.
If you have any questions feel free to ask.
WOuld it be too much to ask for a scan of the instructions? Please let me know.
Thank you.
Marcio
oh man i cant wait to see the finished post on this one... i had thought about buying one of these in the futur and expected it to be a few parts but i only hope the instructions are clear.
and i would have made the mistake of dumping all the parts together into the cleaning bucket and then been properly messed up when it came to building it!.
Good luck!
Post a Comment